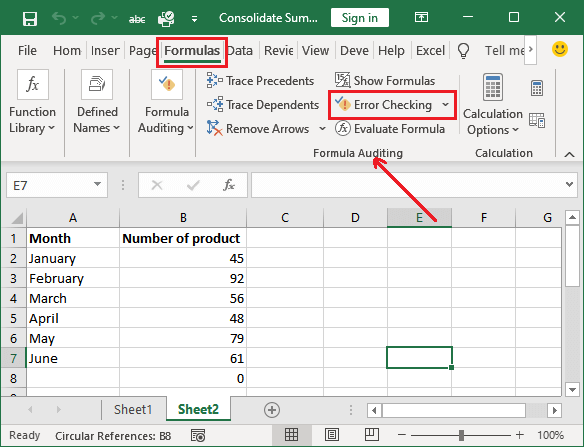
Excel is a powerful tool used by millions worldwide for data analysis, reporting, and various other tasks. There are times when you might need to capture what's on your screen for reports, tutorials, or for collaboration purposes. While screenshots seem like a simple task, when it comes to Excel, capturing specific areas can be quite tricky. This guide will walk you through 5 easy steps to screenshot Excel screen effectively, whether you're on Windows or Mac.
Step 1: Choose Your Area
The first step in capturing an Excel screenshot is deciding what part of the spreadsheet you want to capture. Here are some options:
- Entire Screen: If you want to capture everything on your screen, including Excel and other open windows.
- Current Window: Capture only the active Excel window.
- Selected Cells: You might want to capture just a specific range or cells.
- Chart or Graphic: If you need to take a screenshot of a chart or an inserted graphic within Excel.
Step 2: Use Your Keyboard Shortcuts
Once you’ve decided what you want to capture, here are the shortcuts:
For Windows Users:
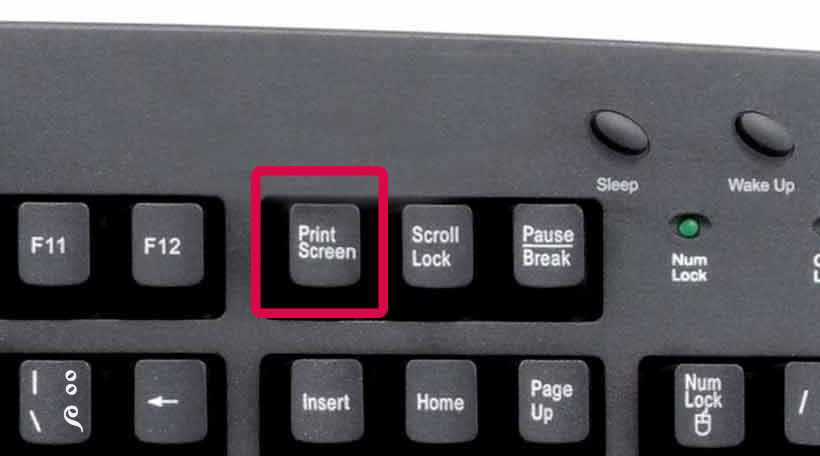
- Entire Screen: Press Print Screen (PrtScn) to copy the screen to the clipboard.
- Current Window: Hit Alt + Print Screen to capture just the active window.
- Selected Area: Use the Windows key + Shift + S for a snip of any area.
For Mac Users:
- Entire Screen: Press Command + Shift + 3.
- Selected Area: Press Command + Shift + 4, then select the area with the cursor.
- Current Window: Press Command + Shift + 4, then hit the Spacebar to select the window.
📌 Note: On newer Macs, you can also use the Command + Shift + 5 shortcut to open the screenshot toolbar for more options.
Step 3: Editing Your Screenshot
After capturing the screenshot, you might want to edit it for clarity or to highlight certain elements:
- Use tools like Microsoft Paint, Snipping Tool (on Windows), or Preview (on Mac) to crop or annotate.
- Consider third-party software like Snagit or Lightshot for more advanced features.
- Remember to save your edited screenshot in a suitable format like JPG or PNG.
Step 4: Pasting Your Screenshot
Once you’re satisfied with your screenshot:
- If it’s on the clipboard, paste it directly into your desired document, email, or image editing software with Ctrl + V or Command + V.
- If you’ve saved it, you can insert or attach it accordingly.
Step 5: Sharing Your Excel Screenshot
Now that your screenshot is ready, consider how you’ll share it:
- Email: Attach the image or copy the screenshot into the email body.
- Reports and Presentations: Insert the screenshot into Word documents or PowerPoint slides.
- Collaborative Work: Share it on shared drives like OneDrive or Google Drive.
- Social Media: Post your screenshot with context to explain what you’ve captured.
The steps above provide a straightforward method to capture, edit, and share screenshots of your Excel work. Whether you're showcasing data, explaining a complex formula, or just need to report on something, mastering these techniques will improve your productivity and communication.
Remember, practice makes perfect. The more you screenshot in Excel, the quicker you'll become, and the more proficient you'll be at choosing the right area, using shortcuts, and applying the right edits. Also, keep in mind that different versions of Excel might have slightly different tools and interfaces, but the core concepts remain the same.
Excel screenshots are not just for documentation; they're a powerful way to communicate data effectively. You can use them for teaching, presenting, troubleshooting, and collaborating on projects. Now that you have these five steps in your toolkit, you're well-equipped to capture and share your Excel work with precision and ease.
Can I take a screenshot of an Excel chart without capturing the entire spreadsheet?
+Yes, you can. Use the ‘selected area’ screenshot method to capture just the chart. On Windows, press Windows key + Shift + S, then select the area. On Mac, press Command + Shift + 4 and drag to select the chart.
How do I capture a screenshot of Excel formulas?
+To capture Excel formulas, make sure they are visible (click into a cell with a formula, then click the Formula Bar). Use the appropriate screenshot method for your area of choice, making sure the formula bar is in view.
What’s the best way to share a large Excel screenshot?
+If your screenshot is large, compress it or use a cloud storage service like Dropbox or OneDrive to share the link instead of attaching it directly to an email.
Related Terms:
- snipping tool in excel
- excel insert screenshot into cell
- how to attach a screenshot
- attach screenshot in excel
- word insert screenshot
- how to add screenshot excel